Ask Latest Price
Active Member
9 Years

Wuhan Huaying Electric Power Tech & Science Co., Ltd
Wuhan Huaying Electric Power Tech & Science Co., Ltd 20 YEARS experience in design and manufacture Hipot Test Set Export to 50 Countries Worldwide Professional Technical Support ISO/CE/CNAS/SGS

Add to Cart
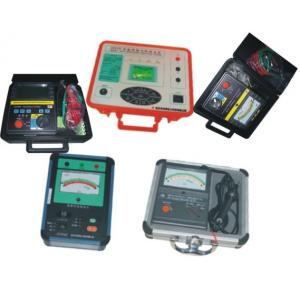
LCD Display Megger Insulation Tester 500V DC 15V Megger Test Equipment 3KG Weight
Technical Specification:
| Model | HY2305 | |||||
| Rated Voltage | 250V | 500V | 1000V | 2500V | 5000V | |
| Measuring Range | 0.0~99.9MΩ 100~999MΩ 1.00~10.0GΩ | 0.0~99.9MΩ 100~999MΩ 1.00~9.99GΩ 10.0~20.0GΩ | 0.0~99.9MΩ 100~999MΩ 1.00~9.99GΩ 10.0~40.0GΩ | 0.0~99.9MΩ 100~999MΩ 1.00~9.99GΩ 10.0~100GΩ | 0.0~99.9MΩ 100~999MΩ 1.00~9.99GΩ 10.0~99.9GΩ 100~200GΩ | |
| Open circuit Voltage | DC 250V +20%, -0% | DC 500V +20%, -0% | DC 1000V +20%, -0% | DC 2500V +20%, -0% | DC 5000V +20%, -0% | |
| Short-circuit Current | Approx 3.3mA | |||||
| Accuracy | ±5%±3dgt | 100GΩor more ±20% | ||||
Panel description

| No. | Name | Function |
| (1) | EARTH | Connected to the shell of DUT or on the ground. |
| (2) | GUARD | Connected to HV retaining ring of DUT in order to eliminate the effection of surface leakage current.. |
| (3) | LINE | High-voltage output terminal, connected to high-voltage conductor of DUT. |
| (4) | LCD Display | Display test results and setting parameters |
| (5) | SETTING | MEM (Memory):Saving test data or view historical test data, keep pressing more than 3 seconds to delete all the stored datas. Time Setting: Setting Time using the button (Time1,Time2,Time3) Auto off (Backlite):Press the button to light up LCD backlight, and automatically turns off after 90 seconds. Up:Press to forward read data or modify data; Down:Press to back read data or modify data |
| (6) | INDICATOR | Showing HV output, power supply working,charging ... |
| (7) | TEST KEY | Press Start testing, clockwise rotation can be locked after pressing the button |
| (8) | CHARGING JACK | 15-19V DC |
| (9) | SHIFT | Selecting Output voltage, also power switch |
Battery:
Note: When the instrument is power on, the meter flashes red power status lights, means that the battery is almost exhausted, should be charged immediately.
1) The instrument can be used two ways AC-DC power supply, but in the field interferences or unstable power supply, it is recommended to use instrument internal power supply.
2) It needs to charging 6 hours when first use instruments, otherwise the meter does not work normally.
3) The charging circuit using a dedicated intelligent charging management module, can automatically stop charging and battery monitoring, the testing process, such as power indicator light flashes that the battery is almost exhausted, need to be recharged, but this time does not affect the instrument normal use.
Note: Before charging, make sure the AC input voltage range should be 220VAC ± 15% to avoid a wrong cause unnecessary loss.
4) One end of the power adapter jack into the power meter (8), the other end of AC power, charging indicator light red light, charging starts.
5) The battery is full when the charging indicator becomes green. the charging time may be longer when fast charging is completed.
Note: The instrument when not in use, make sure the SHIFT (9) is turned off (OFF), if the battery is not in use for long time,please charge the betteries in full and take out from charging room in order to extend battery life.
Note: When the instrument can not start power, you need to recharge or replace the batteries or use AC power supply.